Monday, July 8, 2013

Cheesy Zucchini Bake

This year we decided to see if we could grow some of our own vegetables, so we planted a tiny garden. Well, that tiny garden is thriving! I am very excited about it, but I can foresee us getting really tired of zucchini/yellow squash rather quickly. So, I resorted to finding "new" recipes online to battle the blah that is bound to hit our house.

This recipe is extremely easy and surprisingly tasty! I wasn't sure what to expect, but this was delicious! I'm sure you can change out the seasonings/cheese types to your liking (which also makes this a great versatile recipe).

Cheesy Zucchini/Squash Bake
Ingredients
2-4 zucchini/squash (sliced and cut in half)
2-4 T. chopped basil
2 T. green onion
1 t. Cuban or Cajun seasoning
1 t. garlic powder
1 c. Mexican cheese (divided)

Step by Step Directions
1. Preheat the oven to 350 degrees. Combine all of the above ingredients (reserve 1/2 c. of cheese for later)
Best part of this picture?? All of these ingredients came from my garden! Fresh is BEST!

Mix until all of the squash is covered with cheese/seasonings

2. Spray an 8x8 in baking dish with nonstick spray. Dump the veggies in. Place in oven and bake for 25 minutes.

 3. Top with the remaining cheese and put back into the oven for 10 more minutes. (until the cheese has melted)


Wednesday, June 19, 2013

Another "fake" fried chicken...WHAT?!?!

My husband LOVES fried chicken. But, neither one of us want to look as though we have consumed a lot of fried chicken. We work hard at the gym and we don't want all of those sweaty minutes to go to waste. So, I found a recipe that used buttermilk to coat the chicken and instead of using buttermilk I used greek yogurt. The results were mighty, mighty tasty...if I do say so myself.

Faux Fried Chicken
Marinade Ingredients
1 c. plain greek yogurt
1 T. mustard
2 cloves minced garlic
salt and pepper

Whisk the above ingredients together and top chicken with it. Marinade for 2-3 hours.


Resealable Bag Ingredients ("It's Shake N Bake and I helped!" ~couldn't help but add this in!)
1/2 c. whole wheat flour
1 1/2 t. paprika
1 t. baking powder
salt and pepper

Preheat oven to 425 degrees.

Remove chicken from marinade. Shake off excess marinade. Put chicken into bag and shake.


Cover baking sheet with aluminum foil. Place wire racks on baking sheet. Coat the wire racks with nonstick spray. Place chicken on wire racks.

Bake for 40 minutes. (half way through baking, flip chicken)

Easy Sunday Afternoon Steak Marinade

It has been awhile since we made this marinade, but it will be on our menu again soon! I will note the pictures for this blog post are not exactly "pretty." Let's face it...I was taking pictures of a slab of meat. And, that is exactly what it looks like.

I threw this together and forgot about it when I made it, so our meat actually marinaded for a few days. It still tasted delicious. So, I would figure marinade the meat for at least a few hours would do.


Everything but the Kitchen Sink Steak Marinade
Ingredients
1/3 c. low sodium soy sauce
1/2 c. extra virgin olive oil
1 1/2 T. parsley
1 t. minced garlic
1/3 c. lemon juice
1/4 c. Worcestershire
1 1/2 T. garlic salt
3 T. basil
1 t. cayenne pepper
pepper
(beef cut of your choice)

Step by Step Directions
1. Mix all of your ingredients together. (easy clean up, mix them all in the resealable bag)
2. Pierce the meat a few times and put into bag.
3. Marinade for at least 3-4 hours.
*We grilled the meat to our liking of medium rare. Grill to your desired temperature.


Friday, June 14, 2013

Summer Pasta Salad

This is a very versatile meal or side dish. It can be served hot or cold. The ingredients can be changed based on your own taste buds. All in all....it is the go to dish.


Summer Pasta Salad
Ingredients
4 c. spinach
5 oz. whole wheat/veggie pasta
1/3 c. roasted red pepper (sliced)
2 T. balsamic vinegar
1 1/2 extra virgin olive oil (divided)
2 c. sliced cherry tomatoes
2 T. mozzarella cheese
(optional: cooked chicken cubes)

Step by Step Directions
1. Drizzle half of the extra virgin olive oil in a pan on medium heat. Add the roasted red peppers. After a few minutes, add in the spinach. Cook the pasta according to package directions.
I love Trader Joe's!

2. Once the spinach wilts down, add in the chicken and the balsamic vinegar and the remaining extra virgin olive oil.

3. Drain the pasta. Pour the chicken and veggies over the pasta. Mix together.

4. Add in the sliced tomatoes. Top with mozzarella cheese.

Super Simple, Super Delicious Chicken

This recipe was one that surprised me. I didn't expect something to be so delicious after being so simple! Even the most kitchen challenged will be able to make this one. We cooked the chicken on the grill, but you can definitely make this on the stove top or even bake it. But, any way you make it, it is a MUST do! (now, originally, I found this recipe on Pinterest, but I cannot find it after quite the search, so a BIG shoutout to whoever deserves "props" for this one!)

What We Had for Dinner:


Simply Delicious Chicken
Ingredients
1 t. sea salt
1/2 t. pepper
1 t. sweet paprika
1 T. sugar
1 t. garlic salt
1 t. onion salt
1 t. parsley
2 T. unsalted butter
juice from a lemon
chicken breasts (thawed)

Step by Step Directions
1. In a resealable bag, combine the dry ingredients together.
2. If you are using the grill, melt the butter in the microwave and then pour into the resealable bag. Combine with the dry ingredients.
3. Flatten your chicken. I put the chicken between two paper towels on a cutting board and pound the chicken out with a meat mallet.
4. Put the chicken into the resealable bag. Add the lemon juice. Mix.


5. Once the grill is heated, grill for 6 minutes on one side and 4 on the other.

Stove Top Variation:
Melt the butter in a pan on medium-high heat. Coat the bottom of the pan and then add the chicken. Cover the chicken between flipping. Flip the meat once.


Thursday, June 13, 2013

Roasted Squash and Zucchini

Roasted summer squash and zucchini...just another great side dish! However, I cannot wait to use my own homegrown veggies...but until then, store bought will have to do. Here is a picture of the complete dinner...chicken recipe can be found here


This recipe was originally found on Pinterest, but I made a few changes...

Roasted Summer Squash and Zucchini
Ingredients
1 zucchini, sliced
1 yellow summer squash, sliced
garlic salt
sea salt
pepper
extra virgin olive oil

Step by Step Directions
1. Preheat the oven to 400 degrees
2.Spray a cooking sheet with non stick spray.
3. Line up the slices of squash and zucchini. Drizzle with extra virgin olive oil. Season with garlic salt, sea salt, and pepper.
4. Cook for 12-15 minutes. 
5. Move the veggies under the broiler and heat on High for an additional 3-4 minutes (until the little ones get crispy) Just remember to keep an eye on them!
This pictures is prior to being put under the broiler.

Grilled Asparagus...Best SUMMER side dish!

Asparagus...one of those icky green vegetables that a lot of people don't like...boy, are they missing out! Especially, if they don't try it on the grill!

Here is the super simple recipe for grilled asparagus.

Grilled Asparagus
Ingredients
asparagus
1 T. extra virgin olive oil
1 t. sea salt
1/2 t. pepper
garlic salt* (optional)

**All ingredients are to taste**

Step by Step Directions
1. Lay the asparagus on a piece of aluminum foil.
2. Drizzle the asparagus with extra virgin olive oil.

3. Season with salt, pepper, garlic salt.
4. Fold the foil around the asparagus making a packet. Stab the foil with a fork in a few places to help the steam to escape.

5. Once the grill is heated, place the packet on the shelf. Cook for 10-12 minutes. 

 Perfectly tender and nutritious asparagus!


Summertime means Grillin Time!

First off, I must apologize. I fell off the face of the Earth or at least maybe it seemed like it. My time in the kitchen was replaced by my time spent in the CLASSROOM! I went from a day to day sub to a long term substitute to being a full time 3rd grade teacher! I cannot express how happy or relieved I am to be back in the classroom. That being said, my creativity was mainly used in the classroom rather than the kitchen. Now that school is out for summer, the creativity is in full swing in the kitchen.....or the GRILL as this post will prove.

So, I did a couple of things last night for dinner. The meal was set to be brown sugar marinade grilled salmon recipe, grilled asparagus and rice...but then I found another recipe originally used for chicken, but I knew I had some frozen shrimp, so I decided to throw in some shrimp too. Here is a picture of our feast last night:


Spicy Honey Lime Grilled Shrimp Skewers
Ingredients
1/2 pound - 1 pound thawed shrimp
2 limes, juiced or store bought lime juice
1 1/2 T. honey
3 cloves minced garlic
1 T. extra virgin olive oil
1 t. red pepper flakes (I was generous)
1/2 sea salt
pepper

*Soak wooden skewers in water prior to grilling for approximately 1 hour*

Step by Step
1. Pour all of the ingredients into a resealable plastic bag. Mix it together by "smushing" the bag. (technical term, I know)

2. Add your shrimp. Smush some more.

3. Refrigerate for at least an hour.

4. Slide the shrimp on the skewers. Top with more red pepper flakes and/or pepper.

5. Place the skewers on the grill (top shelf) and grill for about 3 minutes on each side. Grill until the shrimp is pink on both sides. Keep an eye on the wooden skewers, my skewer did catch on fire even after soaking.
Shrimp on the top shelf (with the asparagus packet)
6. Remove and serve! YUM!

Brown Sugar Grilled Salmon 
(Recipe tweaked from this recipe found on Pinterest)
Ingredients
salmon filets (skin on or off)
1/3 c. low sodium soy sauce
1/3 c. water
1/3 c. light brown sugar
1 T. vegetable oil/extra virgin olive oil

Step by Step Directions
1. Pour ingredients into resealable bag. Shake to mix.

2. Place salmon filets into bag.
Terrible picture, but salmon is in the bag!
3. Marinade for at least an hour.

4. When grill is heated, place salmon on grill. Grill 6-8 minutes per side.

*Our salmon had the skin on it, so we didn't flip it so we had extra crispy skin*

Make sure the meat is flaky before removing from the heat. Use a fork to lightly flake away the middle. If it flakes easily, it is done.


Monday, April 8, 2013

Chicken and Fettuccine in Tomato "Cream" Sauce

I have a confession...I have made it a habit to shy away from any recipe that uses cream cheese or heavy cream unless it is some I HAVE TO try. I don't know what it is about cream...maybe the thought of using cream gives me an instant flashback to the Devil Wears Prada when Nigel says to Andy: "Corn chowder? That's an interesting choice. You do know that cellulite is one of the main ingredients in corn chowder." Since that movie moment, I try to stay away from anything that has a ton of empty calories when I'm cooking...

So now, I have a new love! I use Greek yogurt as a replacement to cream cheese and heavy cream!!! WOO HOO! Now, I cannot say this will serve as a true replacement to everything...but I will try it first to say the least.

Today's recipe is one that I have used this replacement. I already know that when I tried this recipe, I used too much "starchy" water, because my fettuccine noodles immediately sucked up too much of the sauce...so, I will have to watch next time I attempt this one. That being said, this recipe is FULL of flavor! And, of course it uses two of my kitchen loves...garlic and red pepper flakes! Serve this with garlic bread and it is a garlic lovers meal!


Chicken and Fettuccine with Tomato "Cream" Sauce
(adapted from Cooking Light, August 2012)
Ingredients
fresh chicken breasts (2-4 pieces), diced
8 oz. uncooked fettuccine noodles
1 T. extra virgin olive oil
4 T. chopped garlic
1 (28oz) can whole peeled tomatoes, drained and crushed (low sodium!)
3 oz. plain greek yogurt
1/2 t. red pepper flakes (or more)
1/4 cup fresh basil leaves
1/2 c. mozzarella cheese, shredded
salt and pepper

Step by Step Directions
1. Cook chicken breasts in either water or chicken stock (for extra flavor), set aside.
2. Cook pasta in 4 quarts of salty water according to box directions. Drain. Keep about 1/2 c. starchy water aside.
3. Heat a large skillet over medium-low heat. Add extra virgin olive oil to pan. Coat the pan. Add garlic. Cook for a few minutes then stir in tomatoes. Cook for 3 minutes. Add in starchy water and bring to a boil.  Add in the chicken.


4. Add in greek yogurt and stir until smooth. Add in red pepper flakes and basil. Pour over noodles. Toss to coat. Add in cheese. Toss again.


Friday, April 5, 2013

A quick tidbit about Chicken Stock

Don't forget to save the chicken stock that is left behind after you Crock Pot a Whole Chicken! Remember to freeze it!!! This was a great find the other night when I didn't want to go to the store after being on vacation and we didn't want to order out. One peek into the freezer and I found a frozen chicken breast and homemade chicken stock!!! I thawed the stock and used it to cook the chicken!!! DELICIOUS! Best part?!?! The chicken stock was 3 months old, but still delicious!!! 

(sorry no picture from this experience...we were too hungry! This is an old picture!) 


I'm a PUBLISHED somebody!!!!

I had to write a post regarding exciting personal news! Previously, I had written a post about my amazing grandmother. (You can read the post I previously wrote here.) Long story short, my grandmother has her own publishing company that she has tirelessly been dedicated to working at for the majority of my life. Prior to her passion for writing and publishing books for kids with special needs and their friends, she was a music teacher. So, it can be said, I wanted to grow up to be like her (and her mother, for that matter.) Now, I didn't become a music teacher, but a teacher nonetheless...so I have accomplished that goal.

Anyway, the reason for this post. My grandmother had asked me a few years ago to write the curriculum that would coincide with the "newer" books in the Turtle Book collection. I was honored that she asked me, but I really didn't know how much work it would take to put it together!!! But, here it is! The brand new edition of the Sensitivity and Awareness Guide!!
And look!!! There is my name!!!
For more information on Turtle Books, PLEASE check out the website

"TURTLE BOOKS fill the missing gap in children’s literature. Now you have easy-to-read books that honestly talk about what it’s like to be a child with a disability. Warm, colorful illustrations and simple, beautiful stories offer insights in dealing with children who have physical and mental disabilities."


For those of you that don't know me, I do not consider myself the strongest "reading" teacher. I like to teach the reading curriculum, but I can't say it is my favorite. Science, of course, is my passion and is SO MUCH more fun. Anyway, when I said yes, I had to start absorbing as much reading curriculum knowledge as possible, so a HUGE thank you goes out to all of my former colleagues that had no idea how much I was spying on their teaching techniques...not to mention all of the spying I did in your own classrooms to see what types of reading activities you were doing. Especially, Tiecea Brown....without her voice in my head while I was writing the questions or thinking about the activities I don't know how I would have been able to make it through. She is the most talented reading teacher I have had the opportunity to work with!!!
Me, Tiecea, and her husband.

And, a thank you that I have to put out there is to all of my former students. The entire time I was writing, I was thinking of all of them...so over the course of 9 years of teaching...that was a lot of different personalities. Without them, I would not be the teacher I am today. A college professor can try to prepare you for them, but NO ONE can prepare you for the day to day classroom experience like a group of kids. I have been blessed to have had some of the best. I don't have any of my own children (yet <-- that is for my mother), but I have had roughly 600 kids I have called "mine" on a temporary basis that I am VERY proud to have known, to have taught, and to (hopefully) made an impact on. My greatest accomplishment in life is to say I am a teacher. To me, it is the best profession out there!!

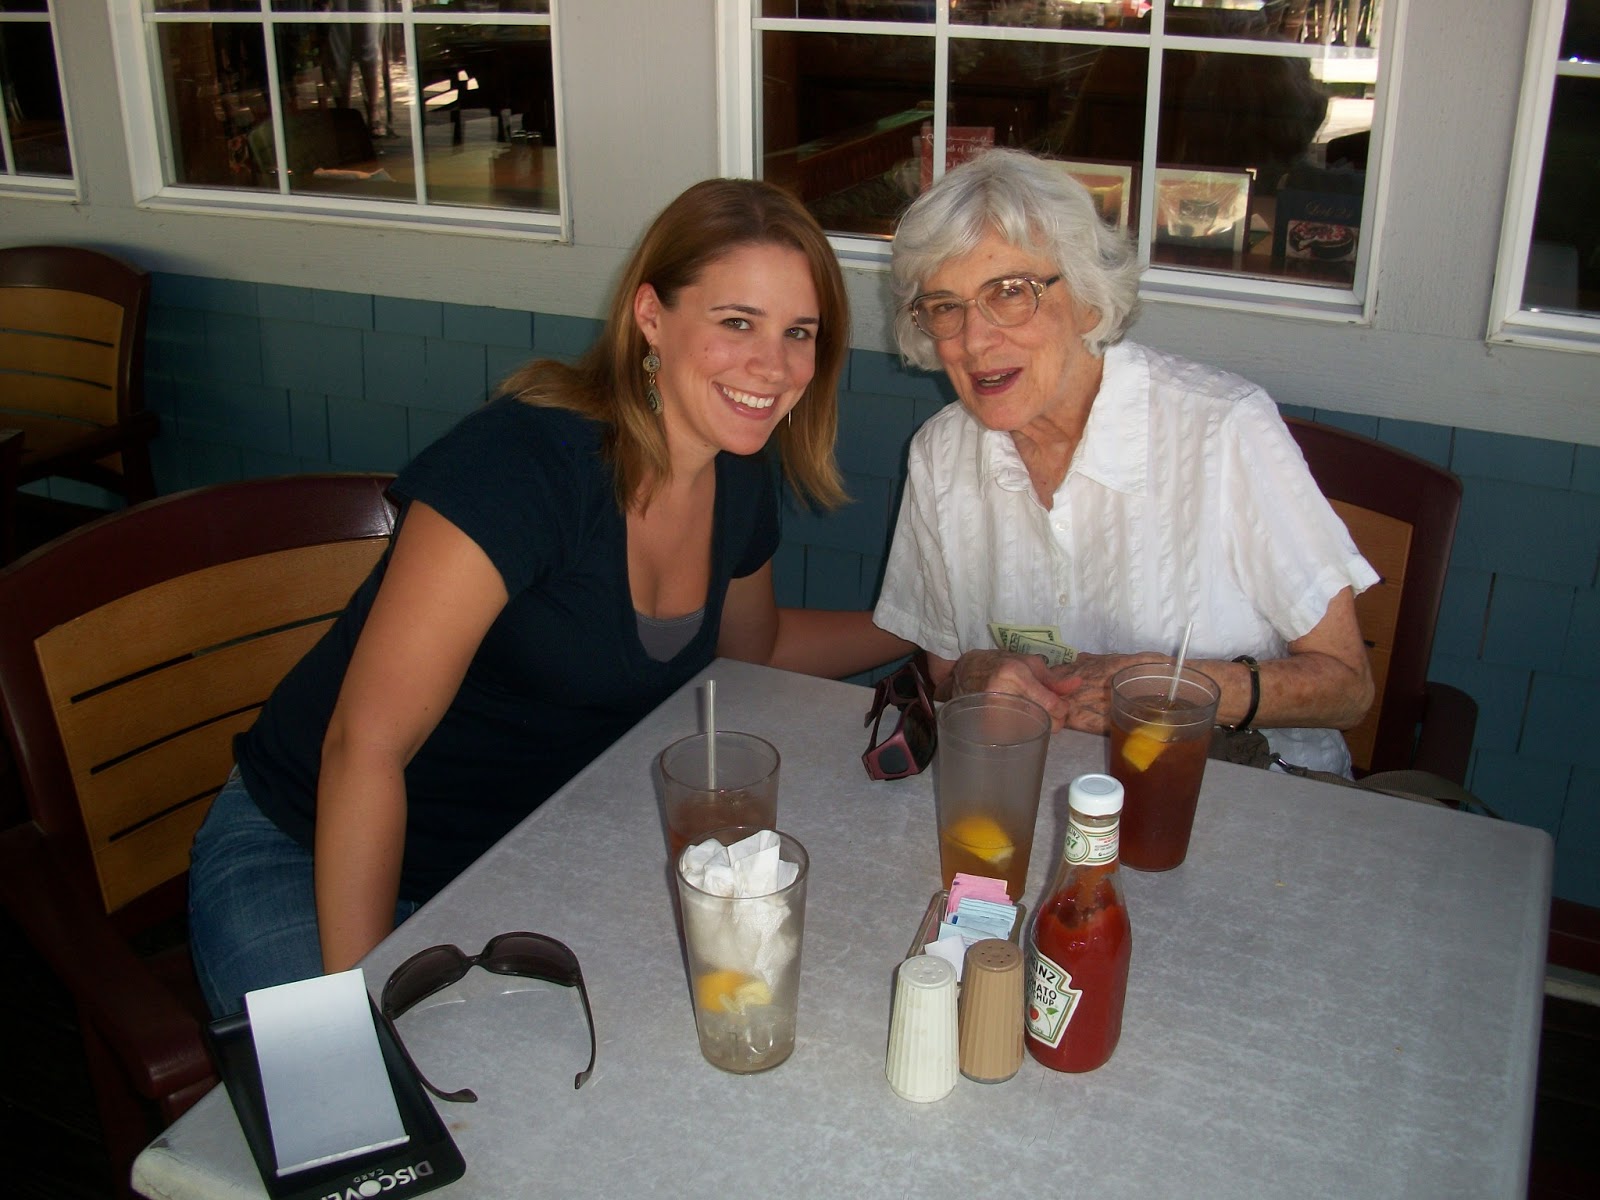
Last, but not least, thank you to my grandmother!!! My "Nan," who is one of a kind. I am very proud to be her granddaughter and am very lucky she has had so many life experiences because I can call her with any type of question and most likely, she has lived through it, conquered it, and can tell me how to do it better.  She is amazing, I cannot even put it into words.
We don't have a lot of pictures together, so she will hate this, but I had to post it!

Okay, this post wasn't intended to be a shout-out of thanks...but apparently, my mind wanted me to do it. So, thanks to those who read my open thank you letter!! And, thank you to those you check out the books! AND AN EVEN BIGGER THANKS, to those who use these books in your classrooms!!!!


Wednesday, March 27, 2013

Easy Chicken Nuggets

We just came back from a quick trip to Florida and we are about to embark on another quick trip to South Carolina, so there was no way I was going to go to the grocery store...nor did I want to go out to eat...so I scoured the freezer in hopes that I would find something easy and HEALTHY to whip up!

Frozen chicken breasts, frozen veggies and rice! PERFECT-O!

This is a take on my mom's chicken nugget recipe...I couldn't tell you how she makes it exactly...but, this is a spinoff.  It's important to flour the chicken, then to coat it in an egg wash and then cover in a bread crumb mixture. Now, I used to dip each piece of chicken in each and this ended up making a HUGE mess. This time, I made a GIGANTIC change that eliminated the mess and honestly, I think the chicken came out the best it ever has!

Easy Chicken Nuggets
Ingredients
chicken breast (I only used 1 for 2 of us)
1 c. flour (whole wheat works too)
1 egg white
3/4 c. Italian bread crumbs
1 t. minced garlic
1 t. tomato and garlic seasoning (really add in whatever spices you enjoy to the bread crumbs)
salt and pepper
1 or 2 resealable bags
1/4 c. water


Step By Step
1. Cut the chicken breasts into pieces. Dip into the flour. (Spray a pan with non stick spray and turn the pan on med-low...cover)
2. Put the chicken into the resealable bag. Pour in the egg white. Make sure the egg white covers the chicken. You can either keep this bag and pour the bread crumbs, garlic and seasonings in or use another bag. (depends on how much egg white is left over in the bag). Either way, make sure you shake the bag around so the chicken is covered).
3. Put the chicken in the pan and cover. Cook for a few minutes. Uncover, pour the water into the pan and then turn the chicken. Cook until the chicken is no longer pink. 


All in all, this recipe can come together and cook within 20 minutes. We paired it with steamed veggies and 7 minute rice. One of my favs!

Tuesday, March 19, 2013

Spicy Hot Kale Chips

I love kale chips, but this recipe may be a bit too much for me! It is literally burning my mouth with the spicy flavor right now! Kale chips are very easy to make, but it isn't a taste that everyone enjoys....Ryan HATES them...and I can't say any of my other friends have truly embraced the kale chip. But, I enjoy them.

The last time I made them, I was very simple...sea salt and Parmesan cheese...pretty simple. This time, I got too creative. I think if you are going to make kale chips, think about what type of potato chips you enjoy and make your kale chips with that in mind.

Spicy Hot Kale Chips
Ingredients
Kale (chopped into small pieces, no stems)
red pepper flakes
1 t. extra virgin olive oil
1/8c. mozzarella cheese
nonstick cooking spray

Step by Step
1. Preheat oven to 300 degrees.
2. Drizzle the olive oil over the kale. Mix the seasoning in and toss with your hands.

3. Spray a baking sheet and then arrange the kale on the sheet. Top with the cheese.

4. Bake for approximately 20 minutes. Feel free to change what rack the baking sheet is on halfway thru baking.

*I haven't found a way to keep them crispy unfortunately...so they are a bake and eat, unfortunately

Monday, March 18, 2013

Jack Daniel's Steak Marinade

I have to be honest, I found this recipe and thought...well, TGI Friday's had a really good whiskey marinade, and the reviews were nothing less than great, so I figured to just go for...and then, I whisked it all together and it DID NOT smell very good...in fact, it made my stomach turn..needless to say...I didn't have high expectations...

Boy, was I wrong! It did smell awful, but we broiled the meat for a total of 7 minutes on high (flipping halfway through). The taste was fantastic!!! I will make this again, but I will probably hold my breath while mixing the ingredients :)

If you are interested in the original recipe, you can find it here. The comments provide other ideas as well!
And here is a picture of our dinner...it looked pretty so I had to feature it!


Jack Daniel's Steak Marinade
Ingredients
1/4 c. Jack Daniel's whiskey
1/4 c. low sodium soy sauce
1/4 c. Dijon mustard
1/4 c. light brown sugar
1/2 diced onion
2-3 cloves minced garlic
1 t. oregano
a few shakes of black pepper
*meat of some sort....you could use beef, chicken, ribs, anything really....

Step by Step Directions
Whisk the ingredients together and marinade the meat for at least 10-12 hours.
Broil on high for 3 minutes...flip...continue for an additional 4 minutes. (or longer, we like medium rare meat)


Ugly pictures, but great taste!!!
Enjoy!